How Can We Help?
2. Print Location ID and Setup
Concept
LocationPrint is to generate location ID and slip for stock take procedure
Import :
there are 3 level of defining stock take.
Zone – area of stock take, it could be coldroom, childroom, shelve, gondola.
Bay -Each block or column for stock
Level- Layer of 1 bay or column or gondola. normally, 1 gondola has 4 or 5 level. (Unless is needed, otherwise use “1” to indicate all.

- LocationPrint > use this application to generate location ID for stock take/ cycle count.
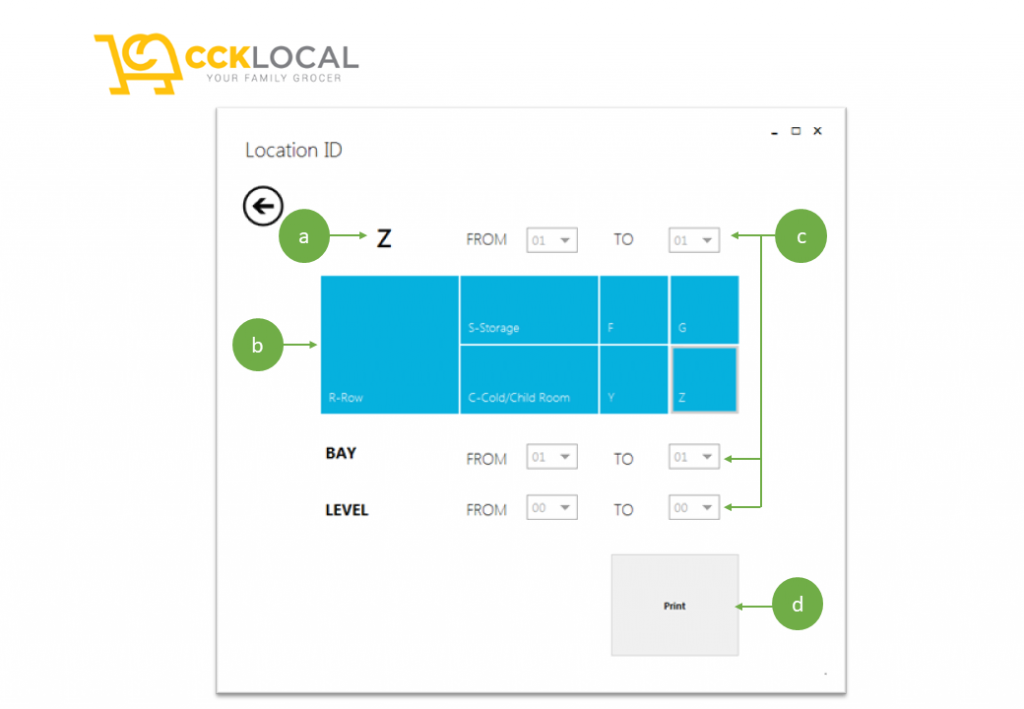
- Click / Touch on the blue tile button (circle-b) > Prefix will shown as per selected character (circle-a).
- Select the number range from and to. Example: you want to print R01 to R10 > Select “10” at TO (circle-c).
- If you only have 1 bay number, just leave FROM 01 TO 01. Otherwise, you can select Number that you want at TO (cirlce-c).
- If LEVEL is applicable, select number range FROM 01 TO 04 if you need 4 levels.
- Click PRINT to generate location slip (circle-d).
- Note: Number range will be multiplied by each level. Example: R01 TO 10, BAY01 TO 08 and LEVEL 00 TO 00; once PRINT is clicked. System will print 10R x 8B = 80 slips.

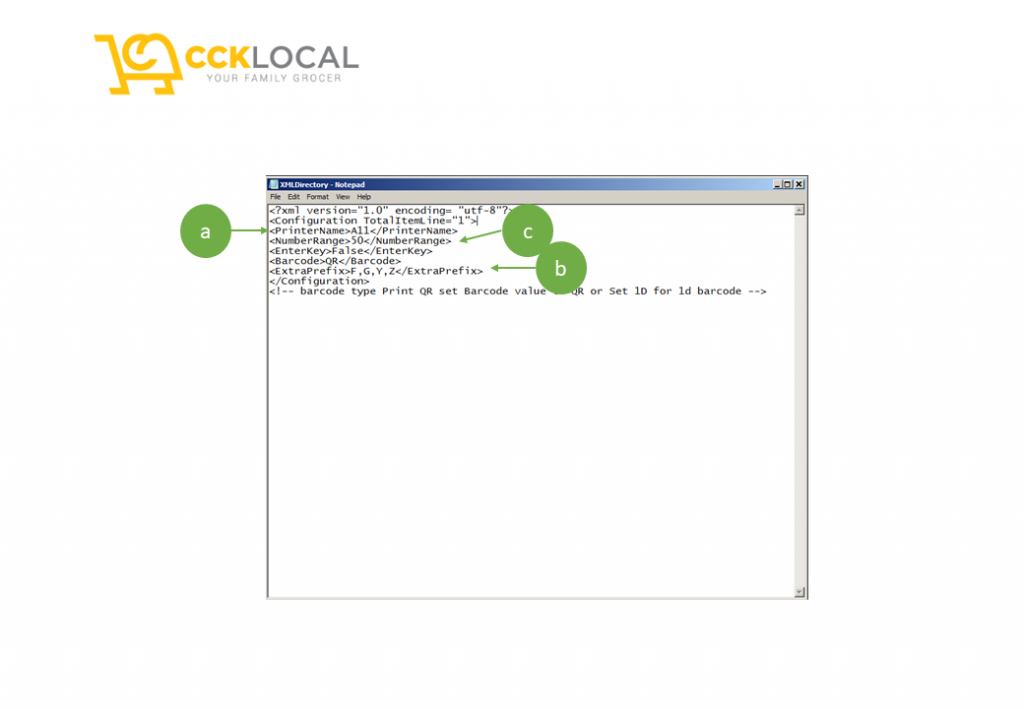
- For initial setup > Go to LocationPrint Folder > open XMLDirectory.XML into Notepad.
- Change the Printer name to correct receipt printer (circle-a).
- <<NumberRange>> is list of number that will show on the user screen. By default, it always 50. In case you required more, change it to 100 or designated number (circle-b).
- <<ExtraPrefix>> is to give personalize alphabet to indicator your stock take zone.